
What You Need
Before starting, make sure you have:- A Movider account
- Access to the Movider dashboard
- Your business information for Sender Name verification
- Access to your COD King admin panel
Step 1: Create a Movider Account
Open the Movider registration page and create an account. Enter your required information and complete the registration process. After successful registration, you will be redirected to the Movider dashboard.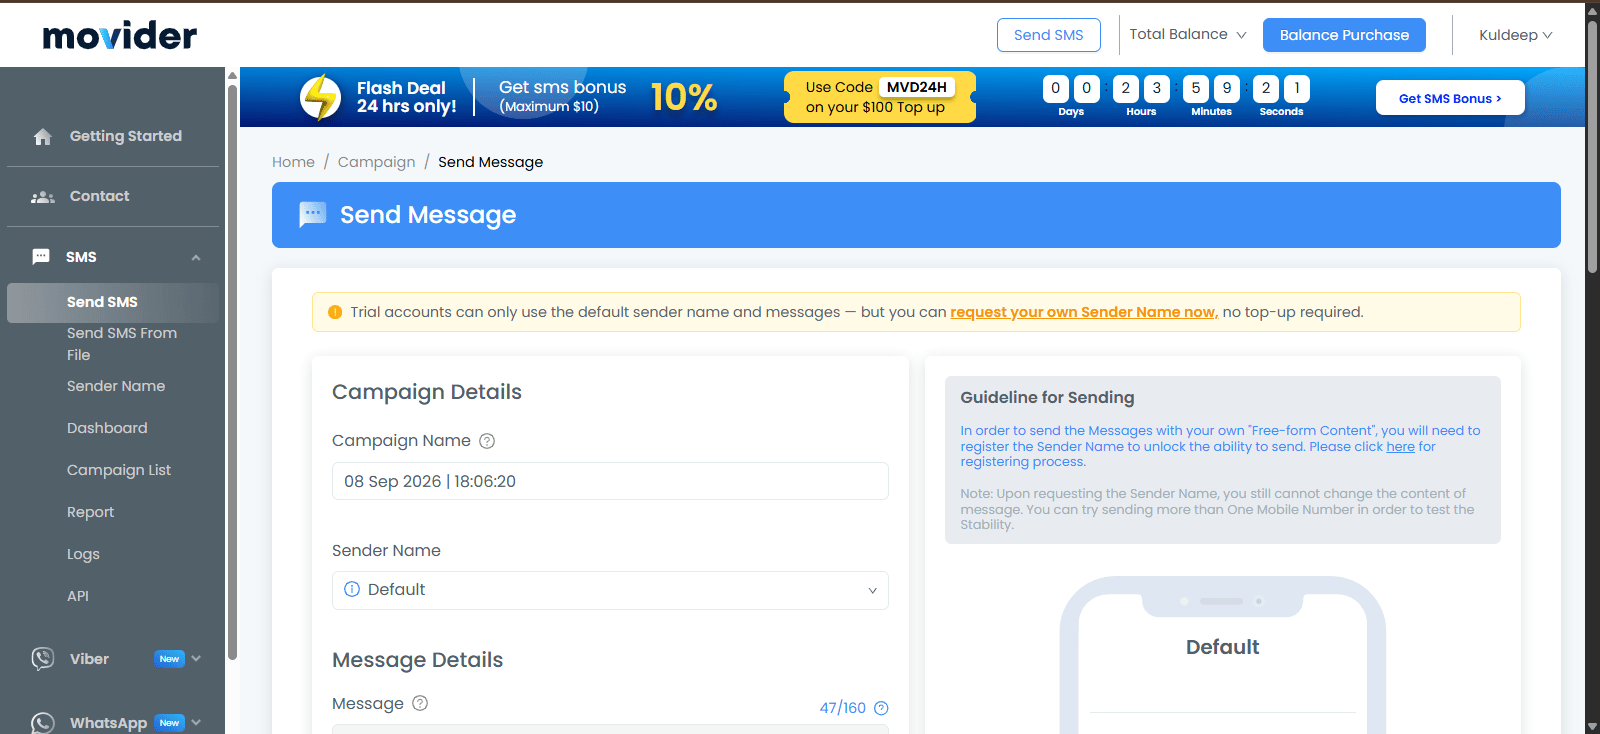
Step 2: Open the API Settings
After logging in, open the Movider dashboard. From the left-side menu, go to: SMS → API This will open the Developer Settings page.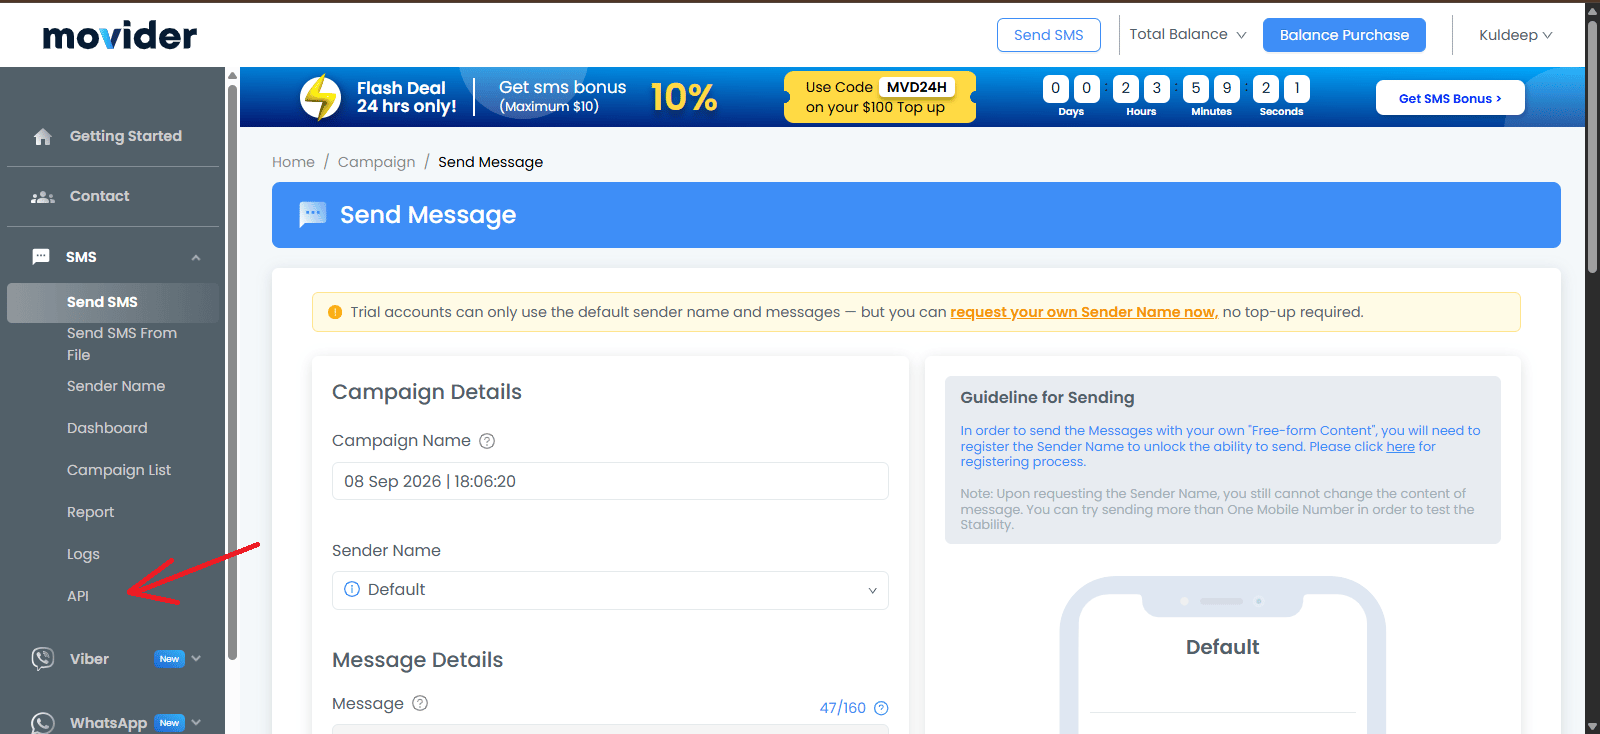
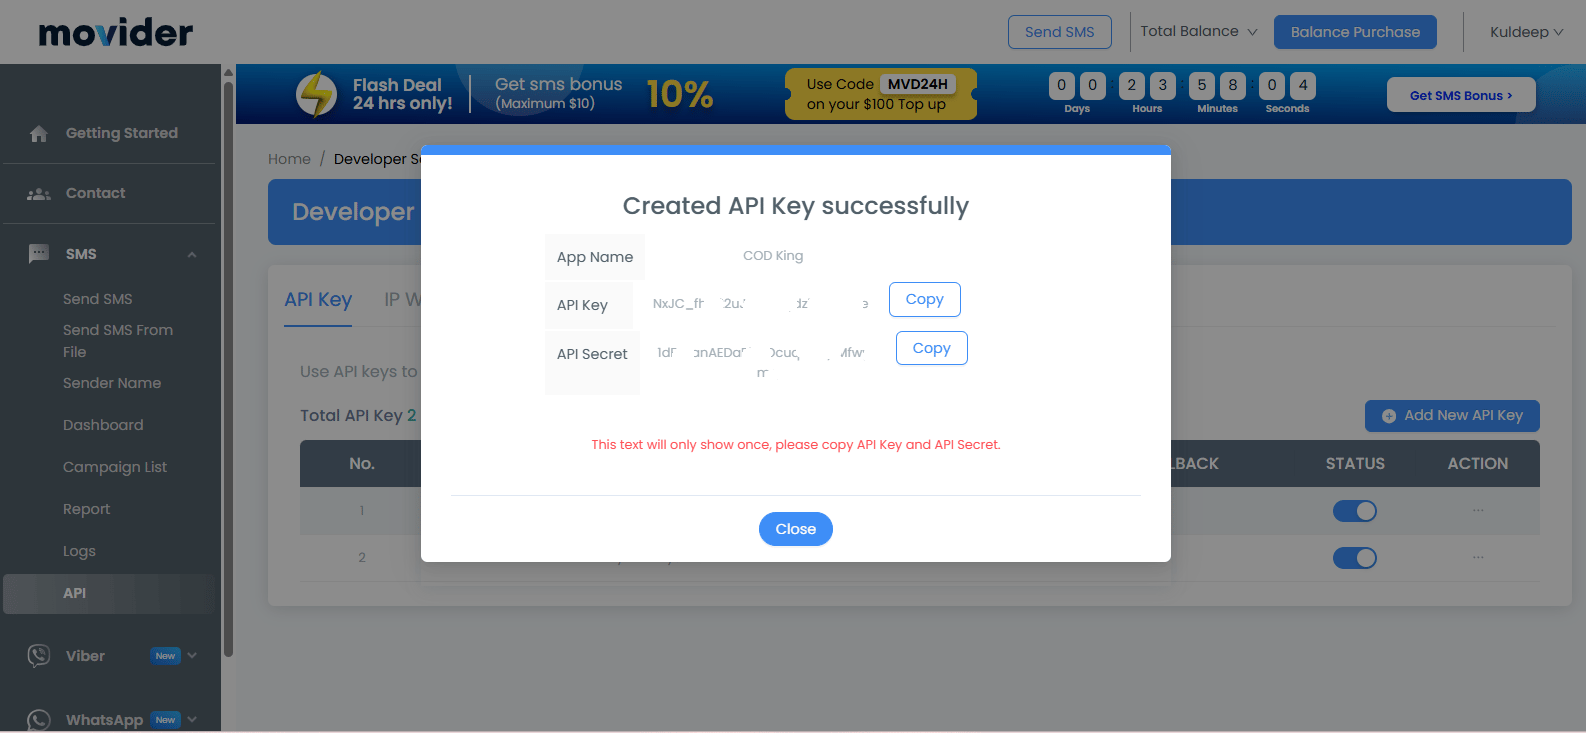
Step 3: Generate an API Key
On the API page, click: Add New API Key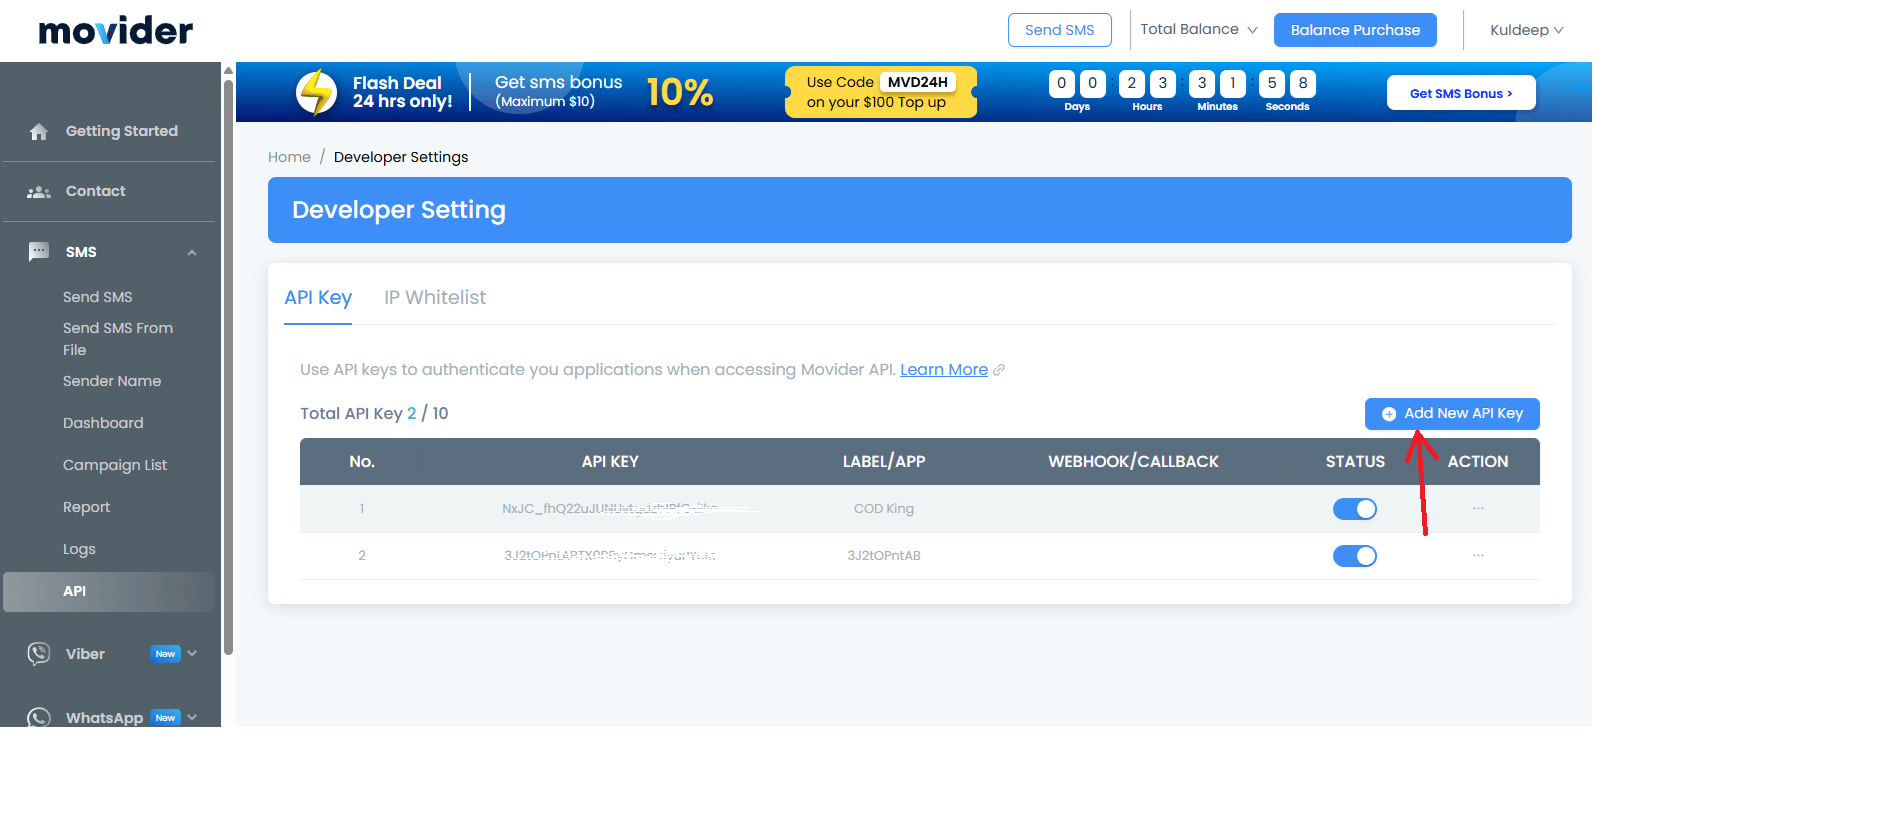
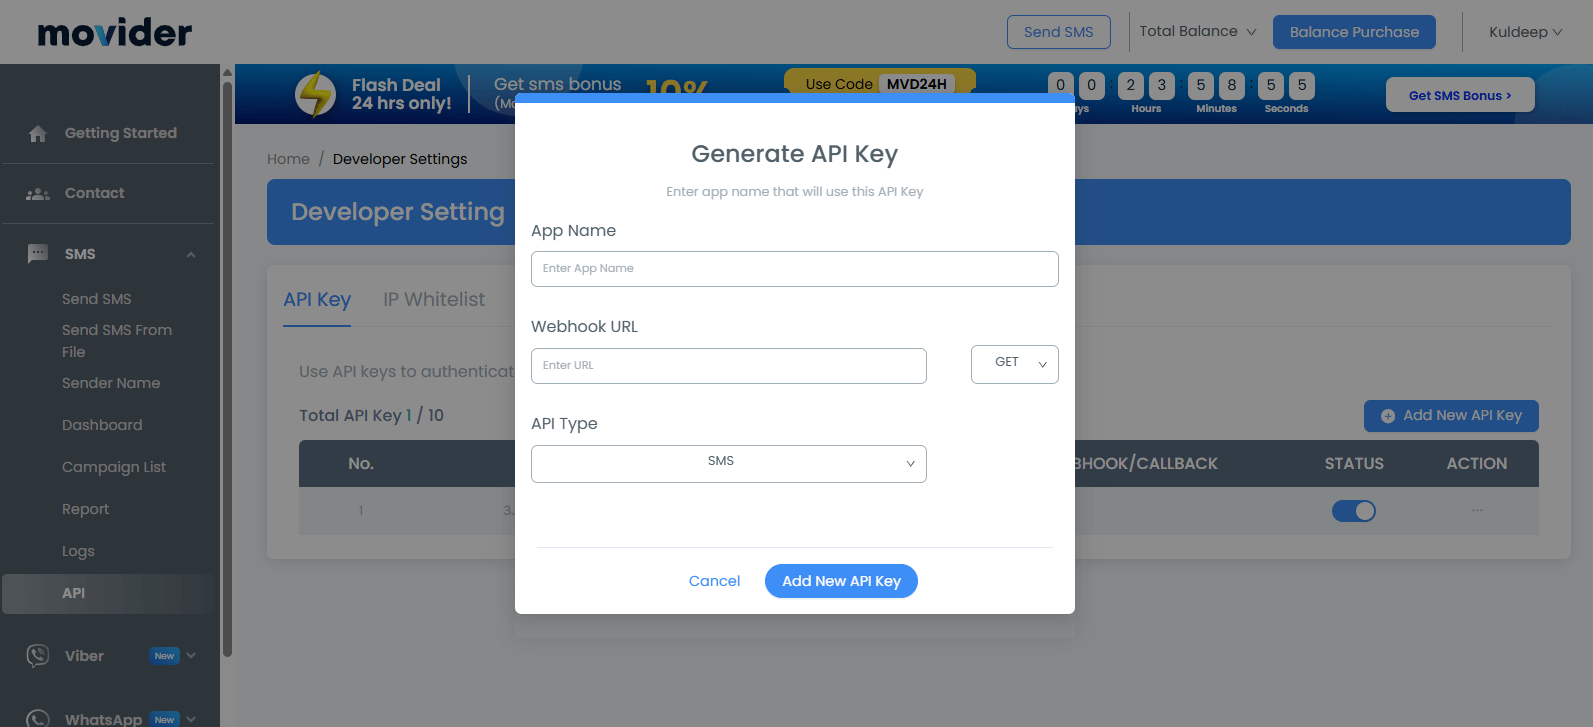
COD King SMS Integration
For Webhook URL, leave the field empty unless you specifically need webhook functionality.
Keep API Type as:
SMS
Then click:
Add New API Key
Movider will generate the API credentials for your integration. Save the generated credentials securely. Important: Do not share your API credentials publicly.
Step 4: Request a Sender Name
The Sender Name is the name that will be used as the sender of your SMS messages. From the Movider dashboard, go to: SMS → Sender Name Click: Sender Name Request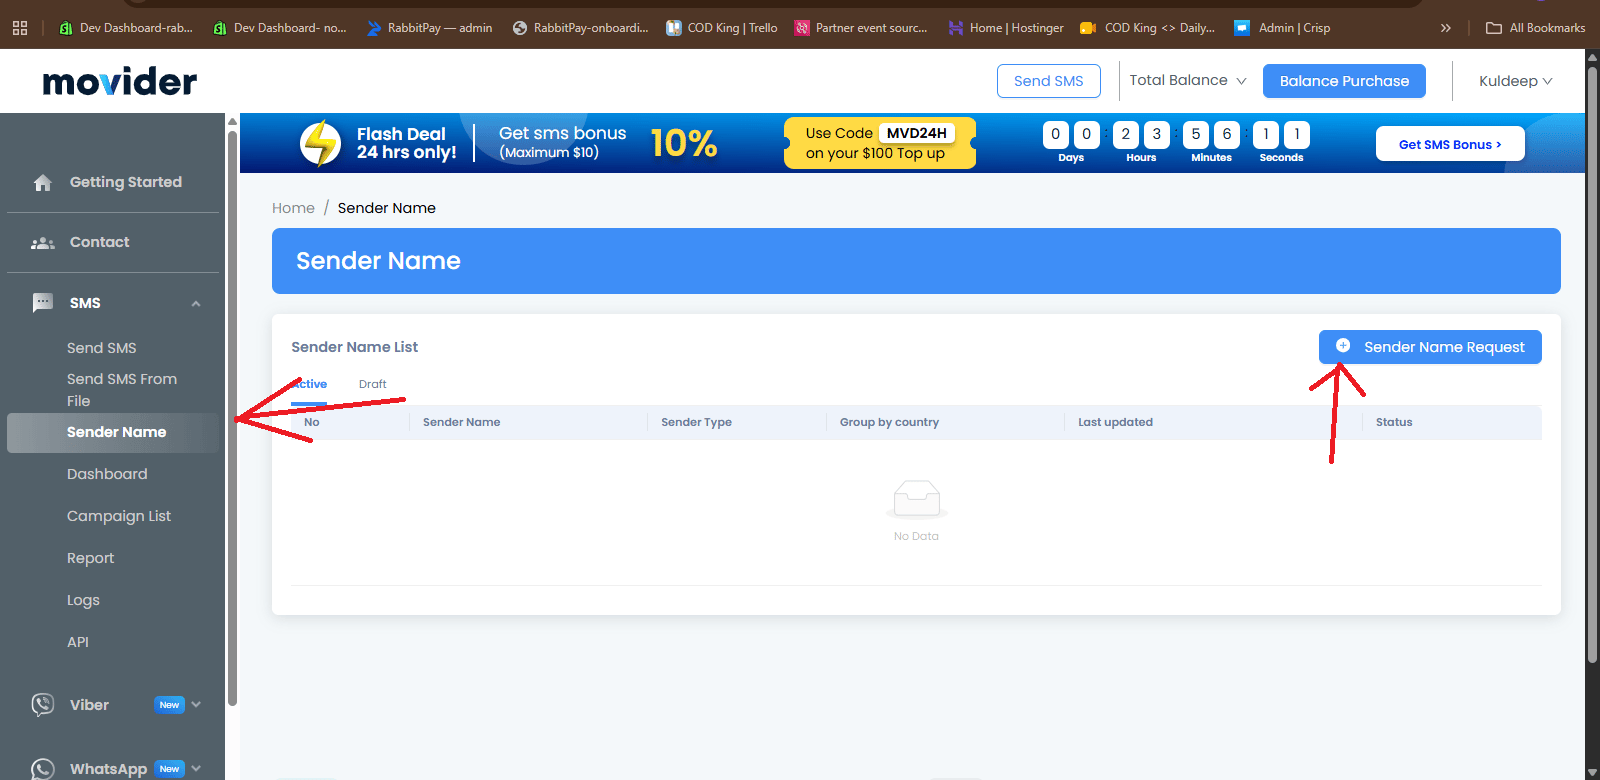
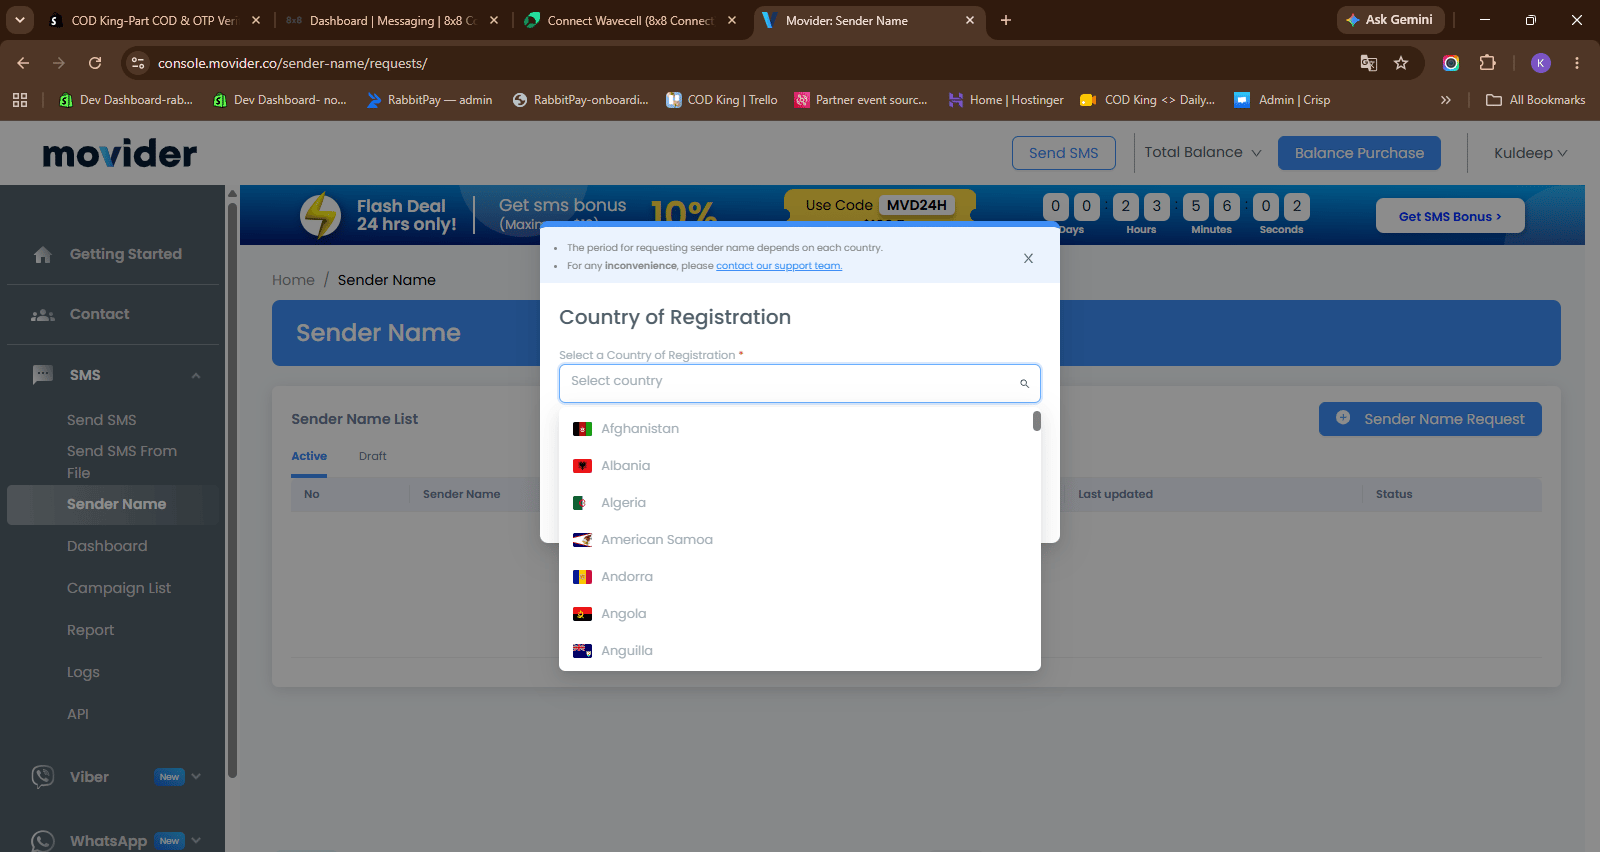
Step 5: Select the Registration Country
In the Sender Name Request window, select: PhilippinesNext, select the Sender Type that matches your business. For example:
- Sole Proprietorship
- Corporate
Step 6: Enter Sender Details
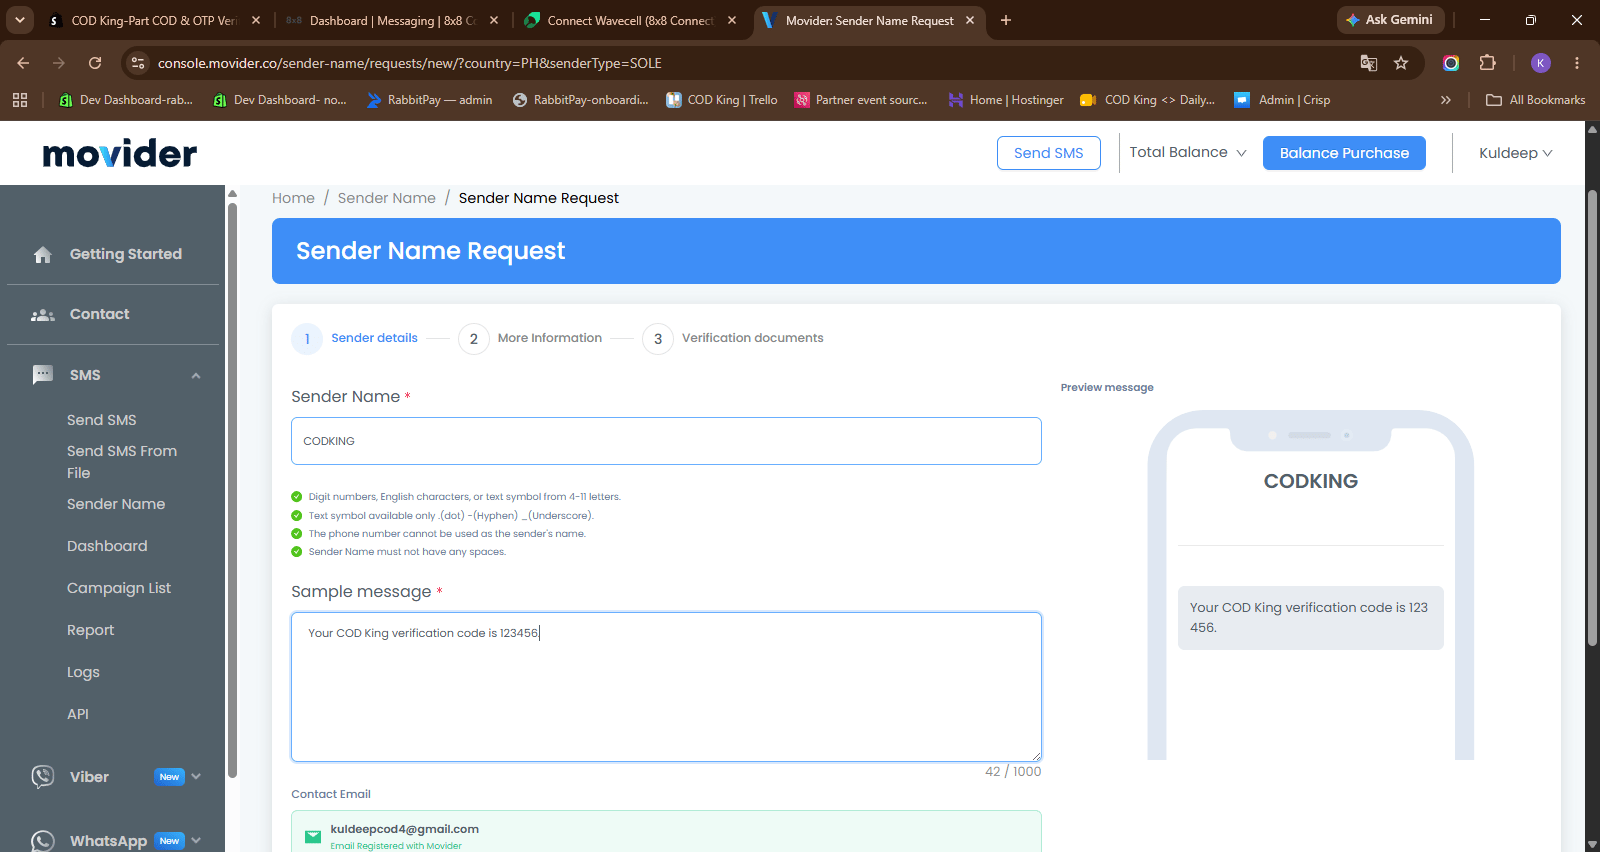
Enter the Sender Name you want to use for your SMS messages. For example:CODKING
Make sure the Sender Name follows the requirements shown by Movider.
Then enter a sample SMS message.
For example:
Your COD King verification code is 123456.
Continue to the next step.
Step 7: Complete Business Information
Movider will ask for additional information about the business and the person requesting the Sender Name. Fill in the required information, such as:- First Name
- Last Name
- Job Title
- Company Name
- Other required business details
Step 8: Complete Verification
Movider may require business documents to verify the Sender Name. Provide the required documents shown on the registration page.Screenshot: Add verification documents screenshot here.Submit the Sender Name request after completing the required information and verification. The Sender Name may need to be reviewed and approved before it can be used.
Step 9: Get the Approved Sender ID
After Movider approves the Sender Name request, the approved Sender Name becomes your Sender ID. For example:CODKING
You will use this Sender ID when configuring Movider in COD King.
Step 10: Open COD King
Log in to your Shopify admin panel and open: COD King → Local SMS Operators Under Network Provider, select: Movider (Philippines)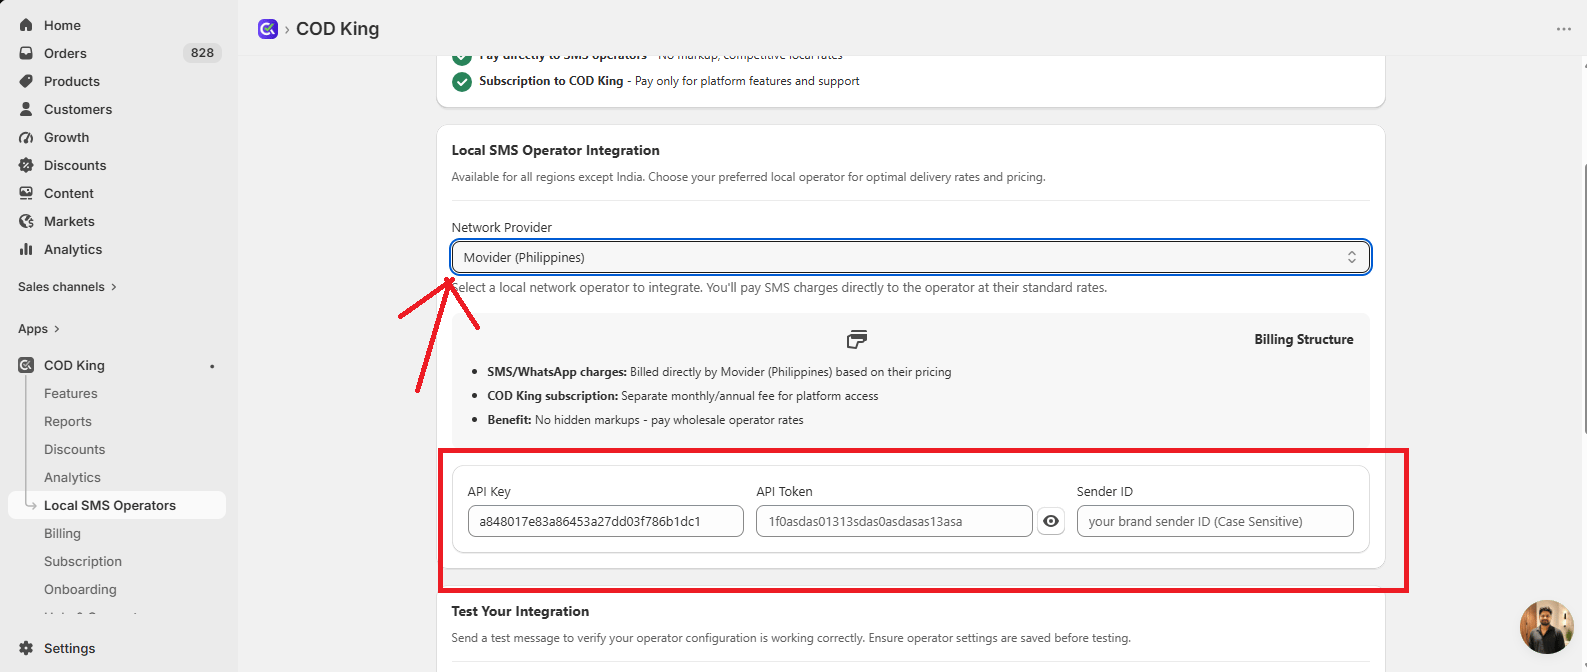
Step 11: Enter Movider Credentials
The Movider configuration in COD King requires three values:
Enter the values you obtained from Movider.
Screenshot: Add completed Movider configuration screenshot here.Make sure the API credentials and Sender ID are entered correctly.
Step 12: Save the Configuration
After entering all three values, click Save. COD King will save the Movider configuration for your store.Step 13: Test SMS
After saving the configuration, trigger an SMS notification from your Shopify store. For example : - Click Send Test SMS to send a test message to the entered phone number.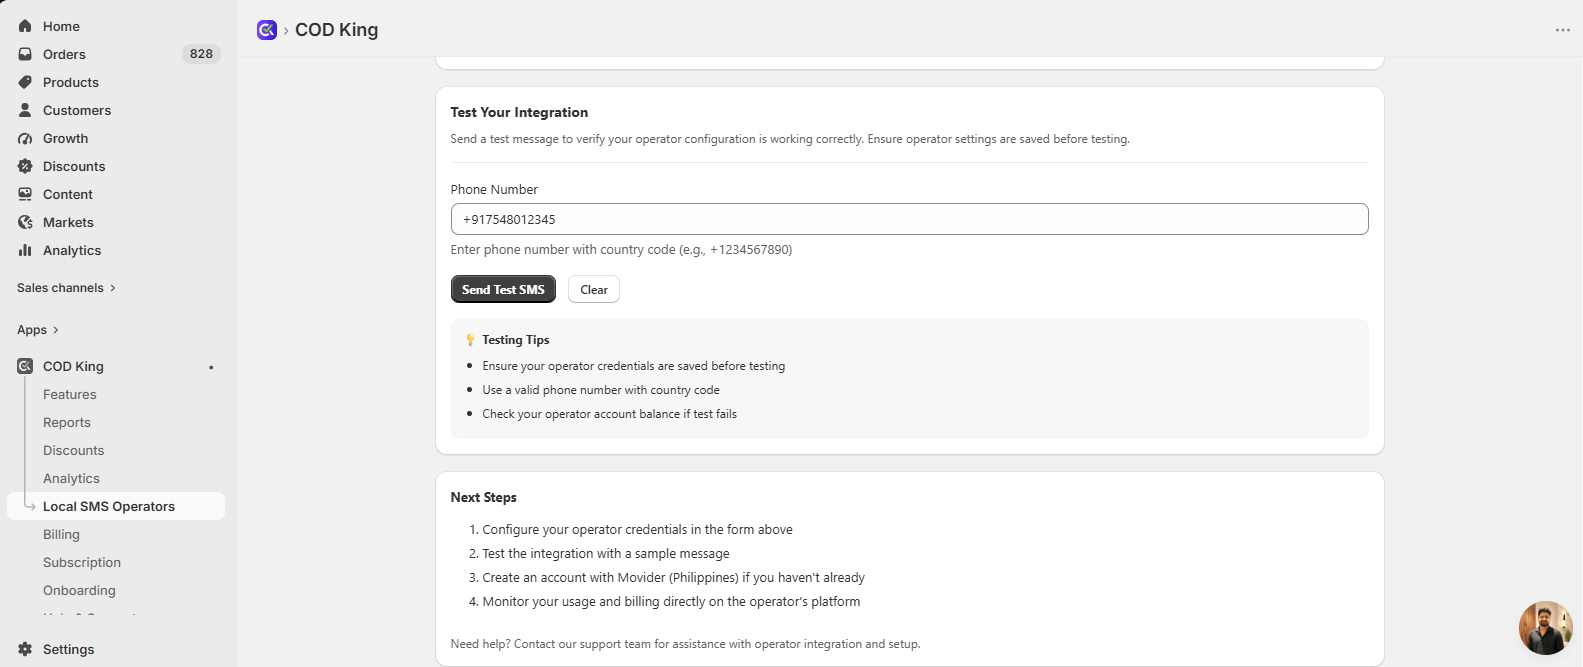
Testing Tips
- Ensure your operator credentials are saved before testing.
- Use a valid phone number with the country code.
- Check your Movider account balance if the test message fails.
Movider Configuration Summary
You need these three values to connect Movider with COD King:
Once the configuration is saved and the test SMS is successful, Movider is ready to be used with COD King.